

On CSPR.trade, you can be a liquidity provider and earn fees by contributing tokens to a shared pool that supports trading on the platform.
In return, liquidity providers earn a share of the fees generated by swaps based on their percentage of the pool.
Providing liquidity also improves the trading experience on CSPR.trade by making swaps easier and supporting a healthier on-chain market.
This guide walks you through providing liquidity using Casper Wallet.

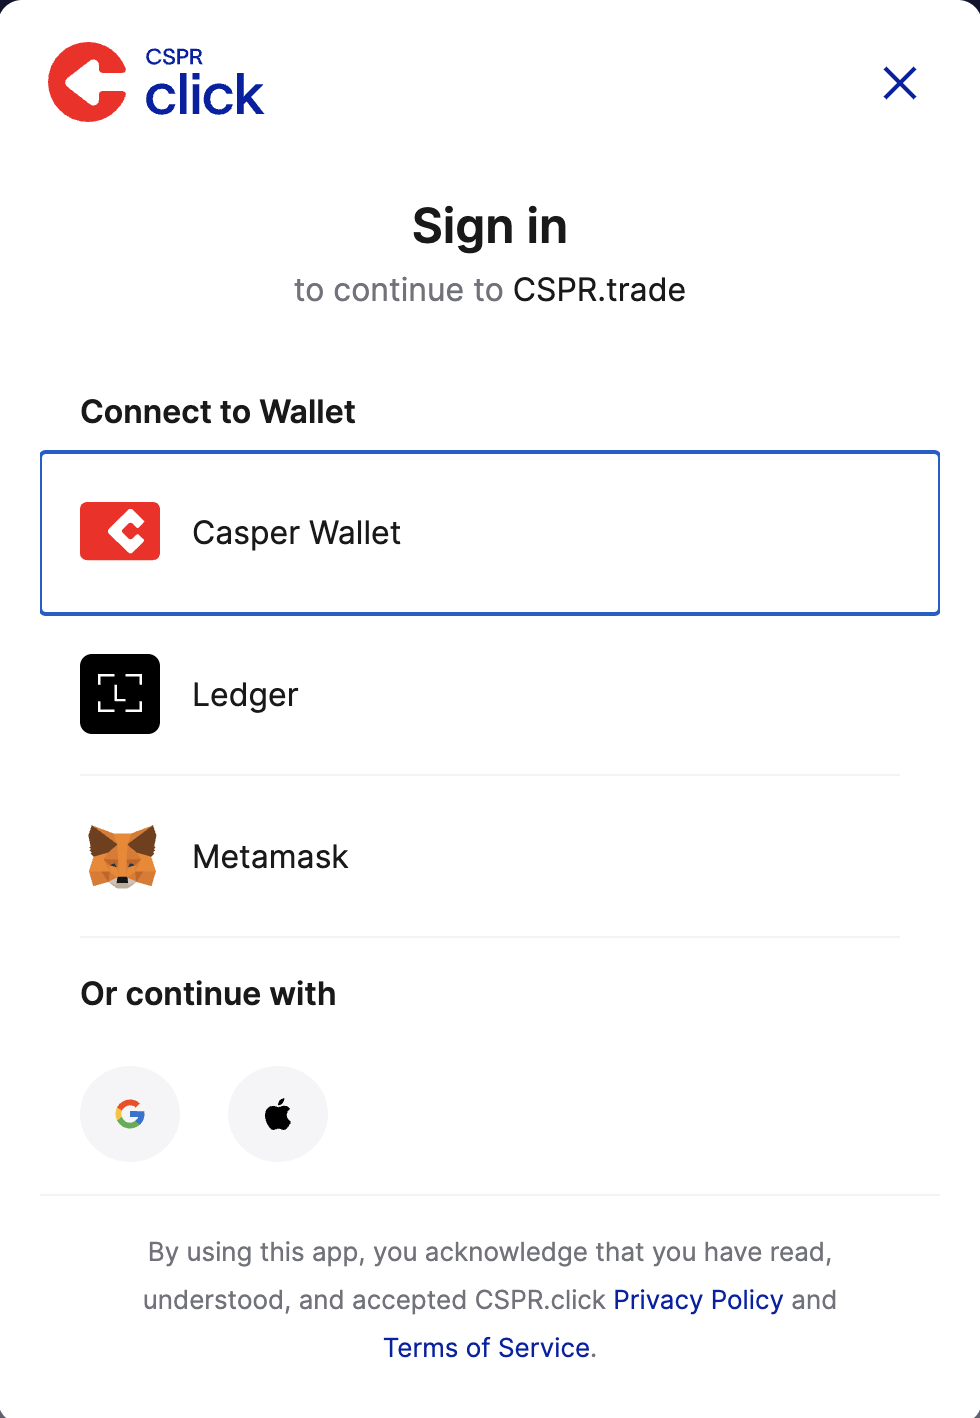
Open CSPR.trade and click Sign in. Select Casper Wallet and approve the connection request. Once signed in, you will have access to the “Pairs” and “Pools” pages.
Go to the Pairs page to see available token pairs. Alternatively, go to the Pool page, click Create Liquidity Position, and create a new pair yourself. New pairs will then appear on the Pairs page.

Select a pair to inspect its details before adding liquidity. The screen shows:
Review this page to understand the pair’s activity before entering.

You must hold both tokens in the pair. If you already have both, skip to Step 5.
If you only have one, use the Trade button to get the other. For example, if you have CSPR and want to join the CSPR/sCSPR pool, you need an equal value of both. You can simply swap half your CSPR for sCSPR.
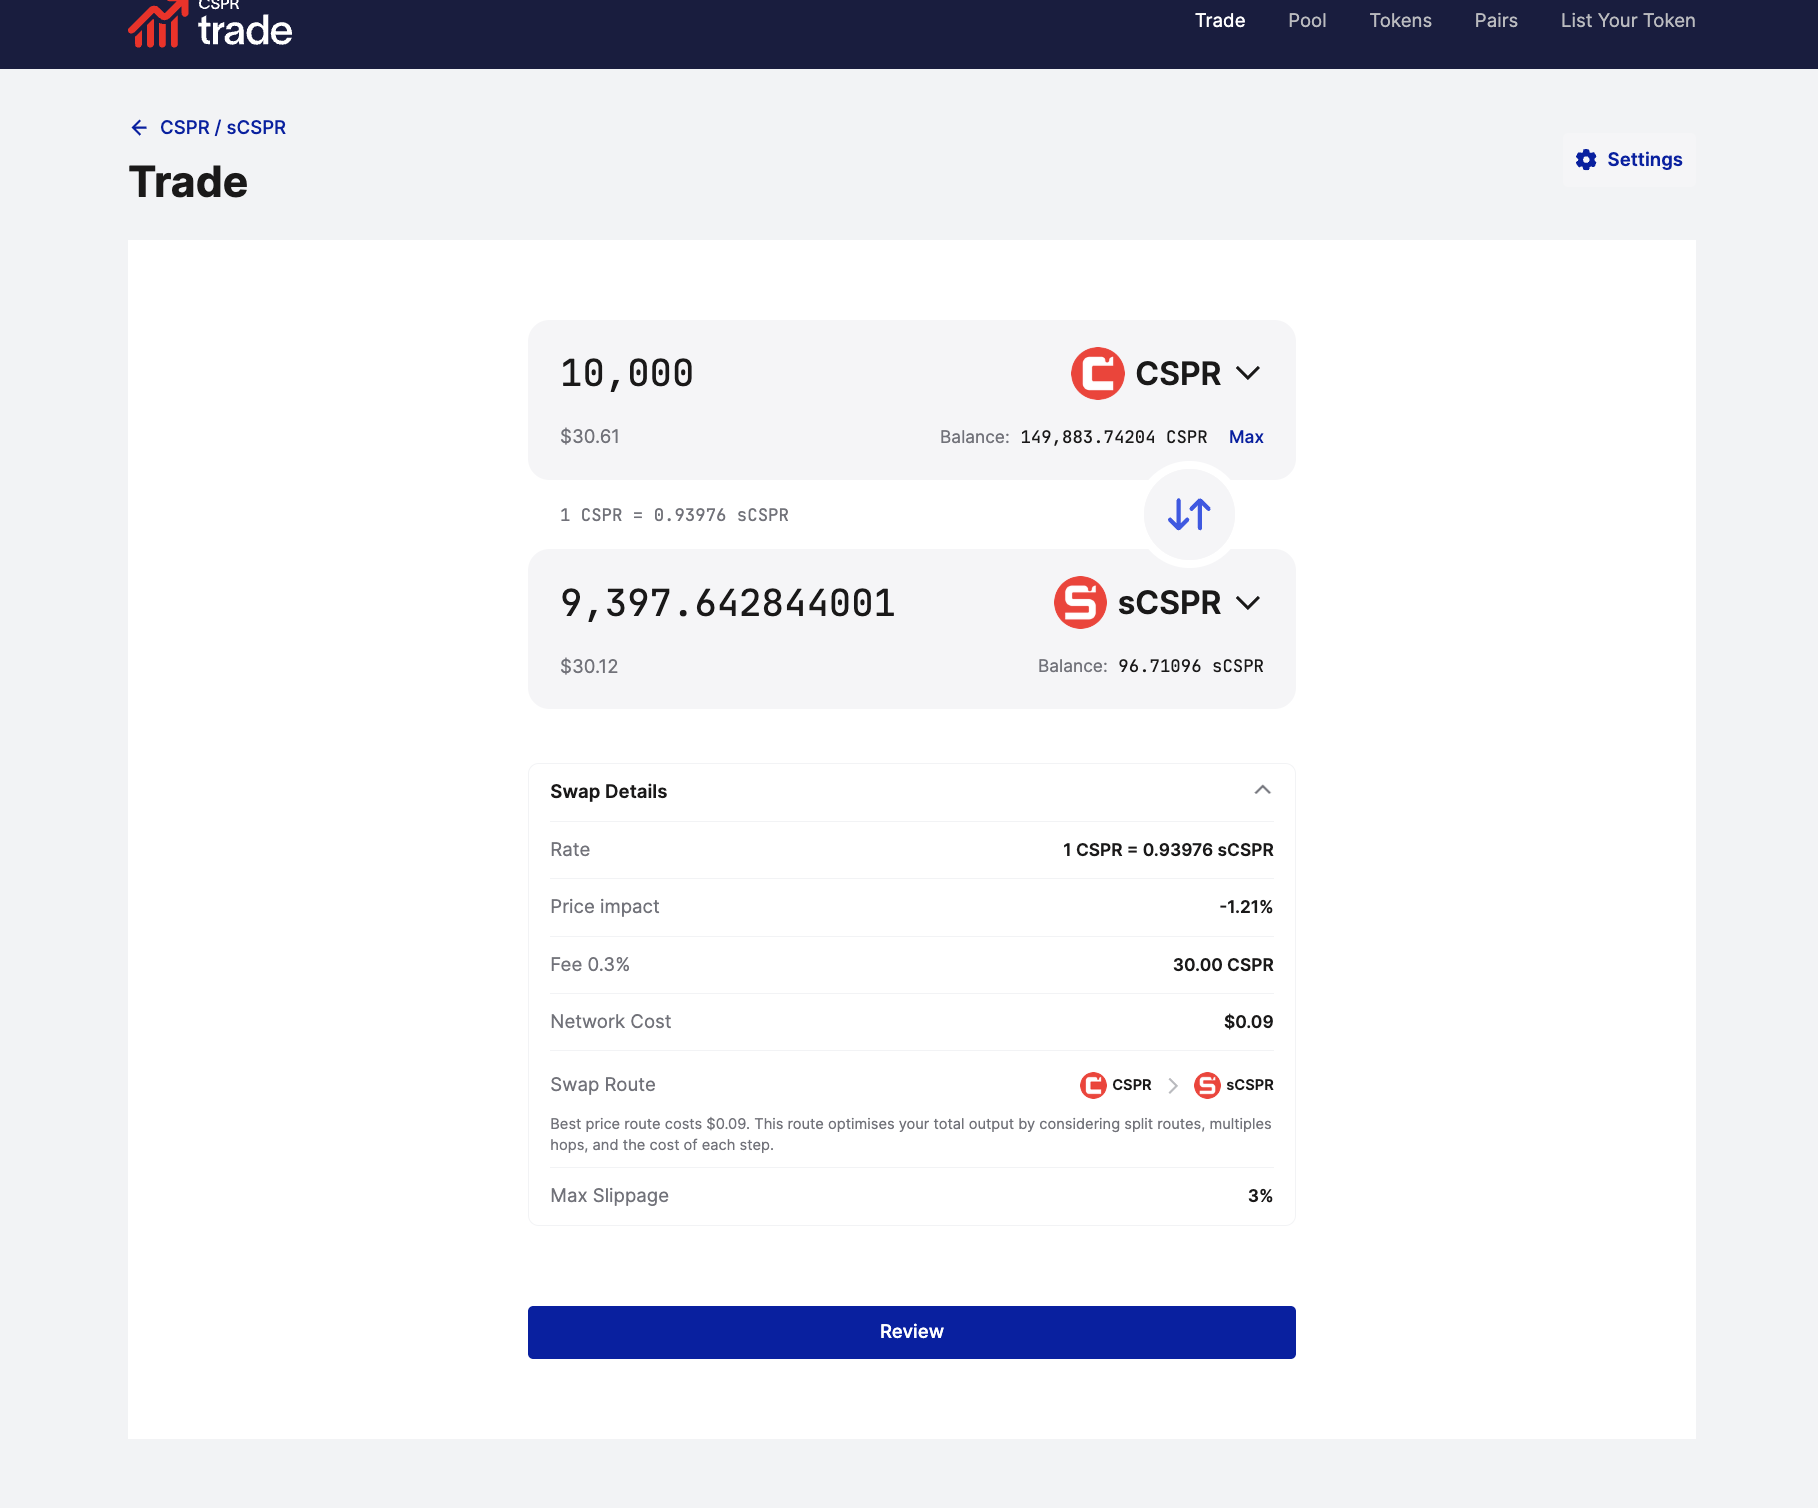
Enter the amount, check the price impact and fees, click Review, and confirm the swap in Casper Wallet.

Note that when providing liquidity to pairs that include sCSPR, you can obtain the liquid staking token from the Wise Lending Liquid Staking platform.
Once you hold both tokens, go to Pairs > Add Liquidity. Enter the amount you want to deposit; the platform automatically matches the value of the second token. You can use Max for one side if needed.
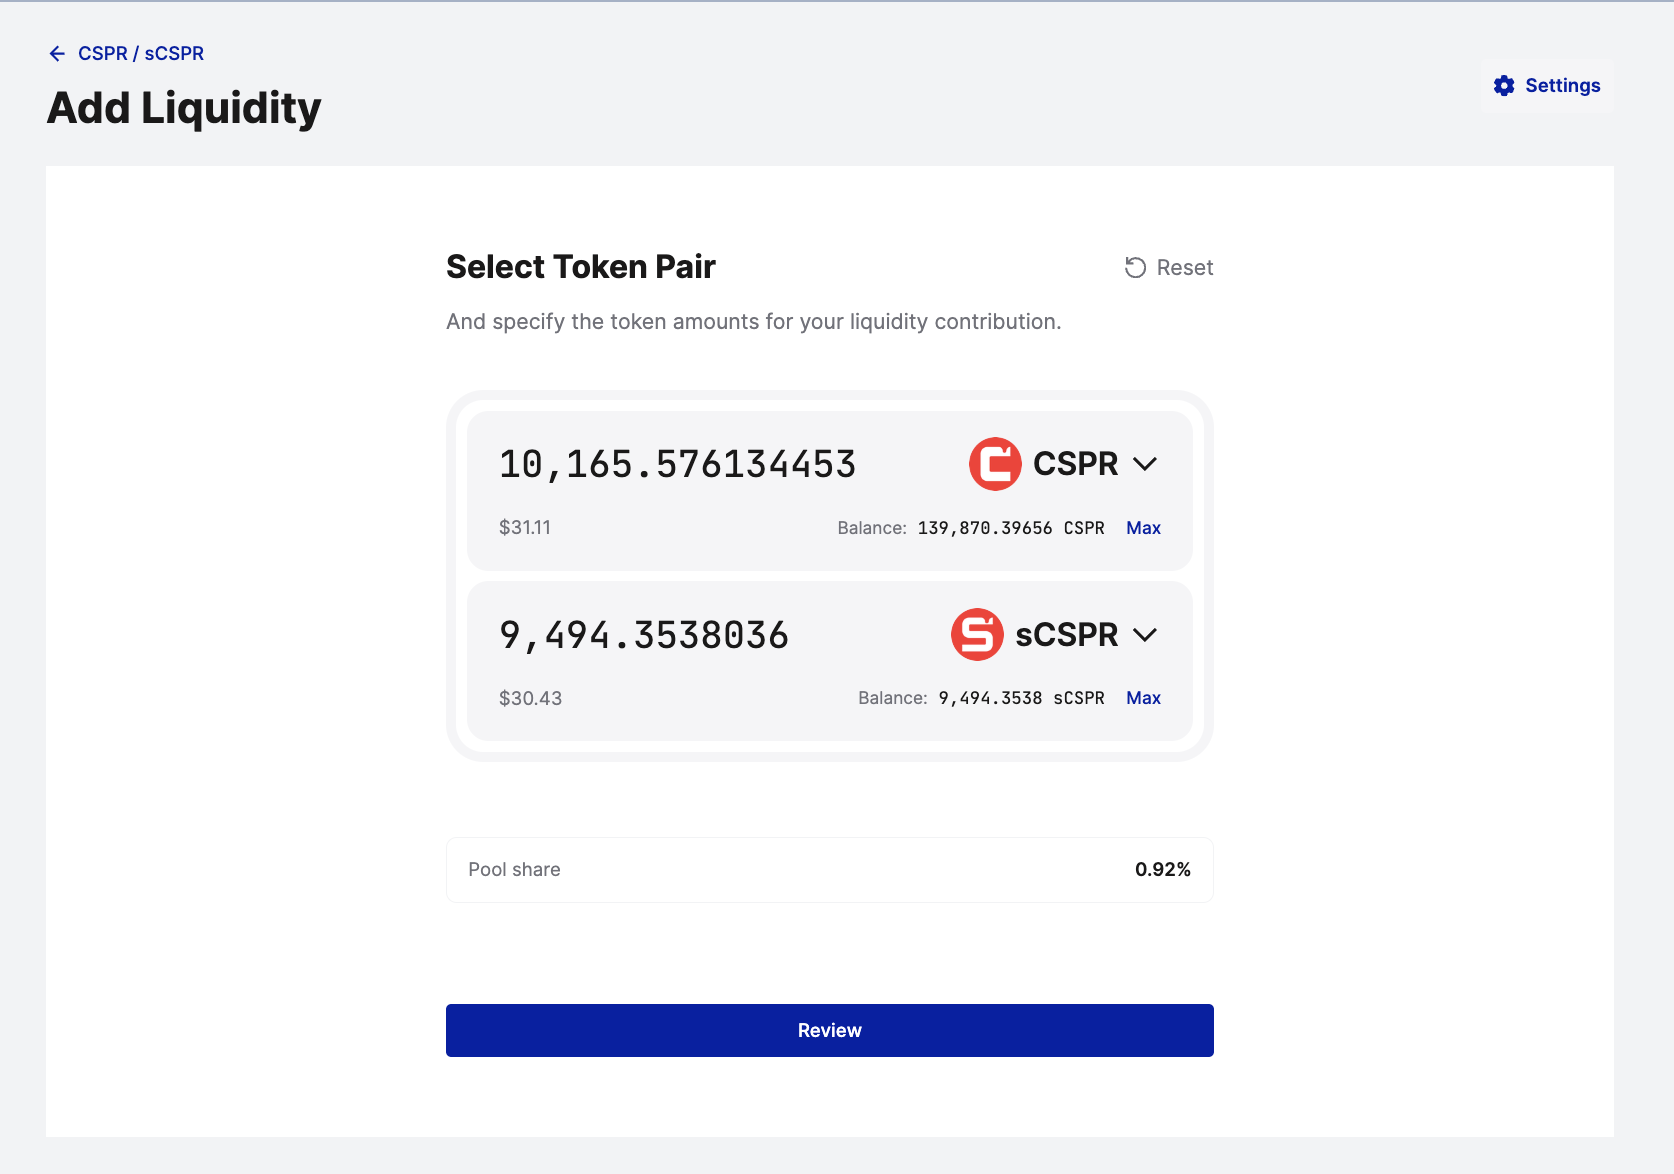
Below the amounts, your Pool Share is displayed. This percentage determines how much of the trading fees you will receive. Click Review.
Confirm that you want to deposit both assets. Your final pool share is shown again before submission, so you know exactly what your deposit represents.
Casper Wallet will open a Signature Request. Check the details and sign to approve the addition of liquidity. The transaction will then process on-chain.
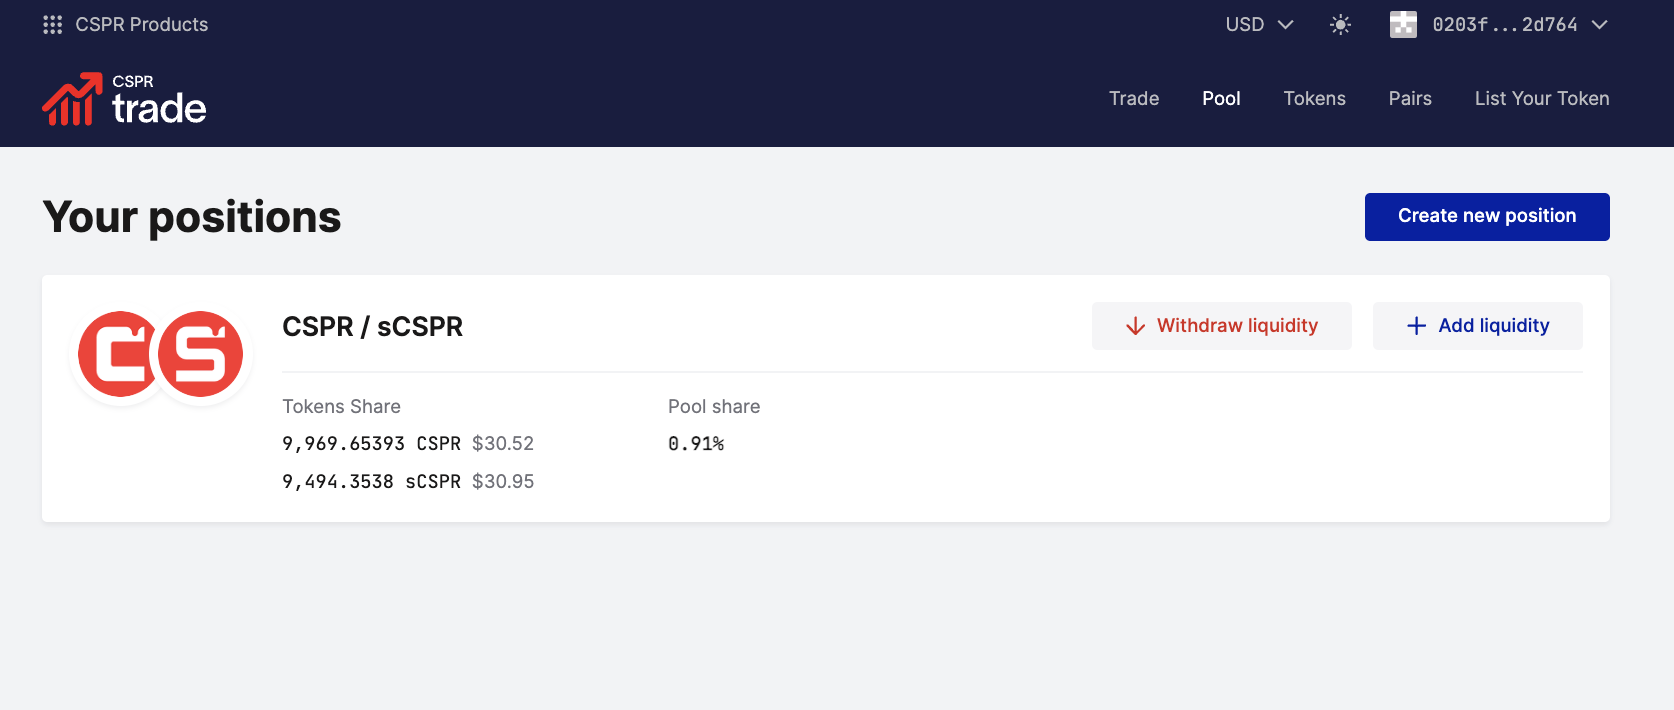
Once completed, go to the Pools page. Your position will appear under Your positions. From here, you can manage your liquidity, add more, or withdraw your funds.
That’s it! You are now providing liquidity and will start earning fees immediately.
Providing liquidity on CSPR.trade allows you to earn trading fees while supporting the Casper ecosystem. You can monitor and manage your live positions anytime from the Pools page.
Understand Impermanent Loss: Providing liquidity involves impermanent loss, which occurs when token prices change relative to each other. Ensure you understand this risk before adding liquidity.
