

Liquid staking lets you earn staking rewards without locking your tokens into an unusable state.
In traditional staking, once you stake your tokens, they are tied up; you cannot easily move them, trade them, or use them elsewhere.
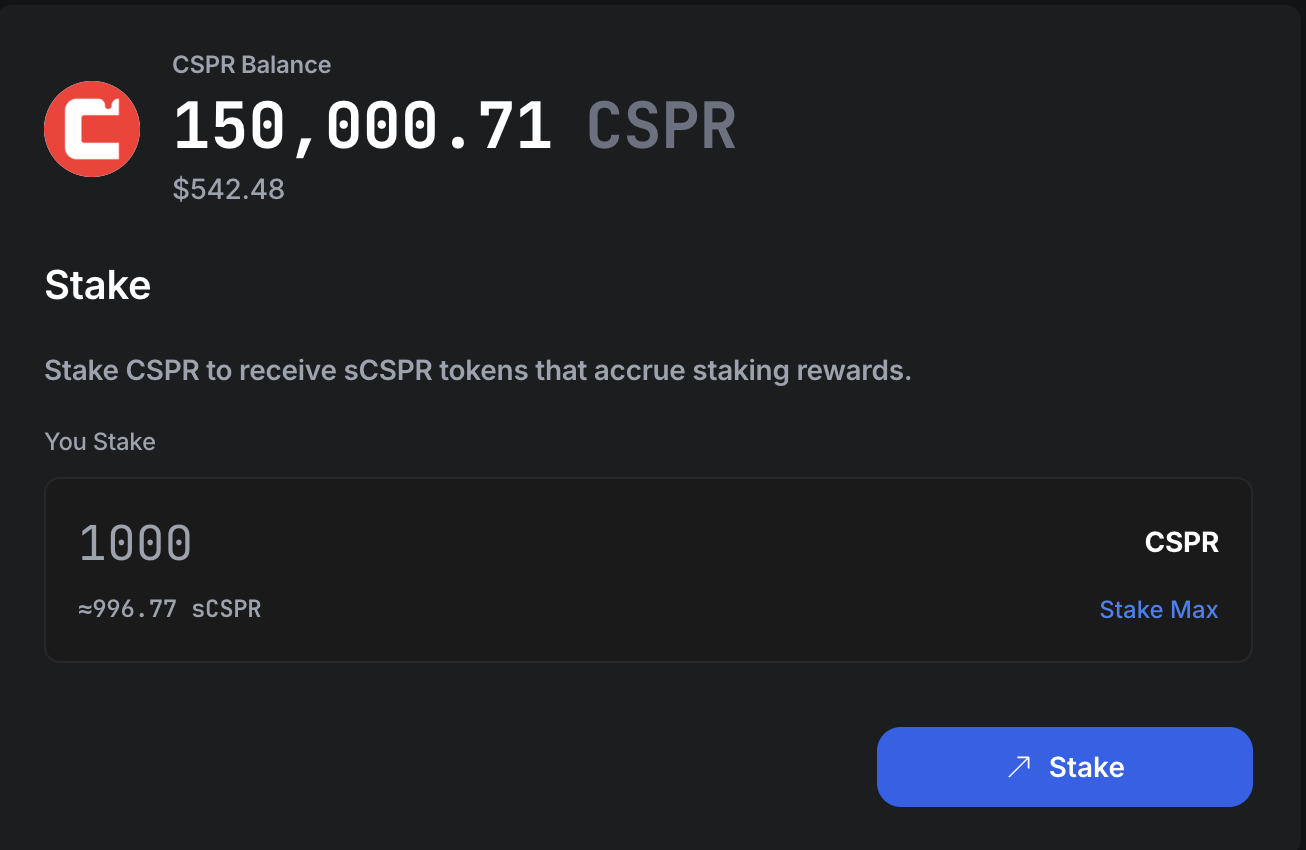
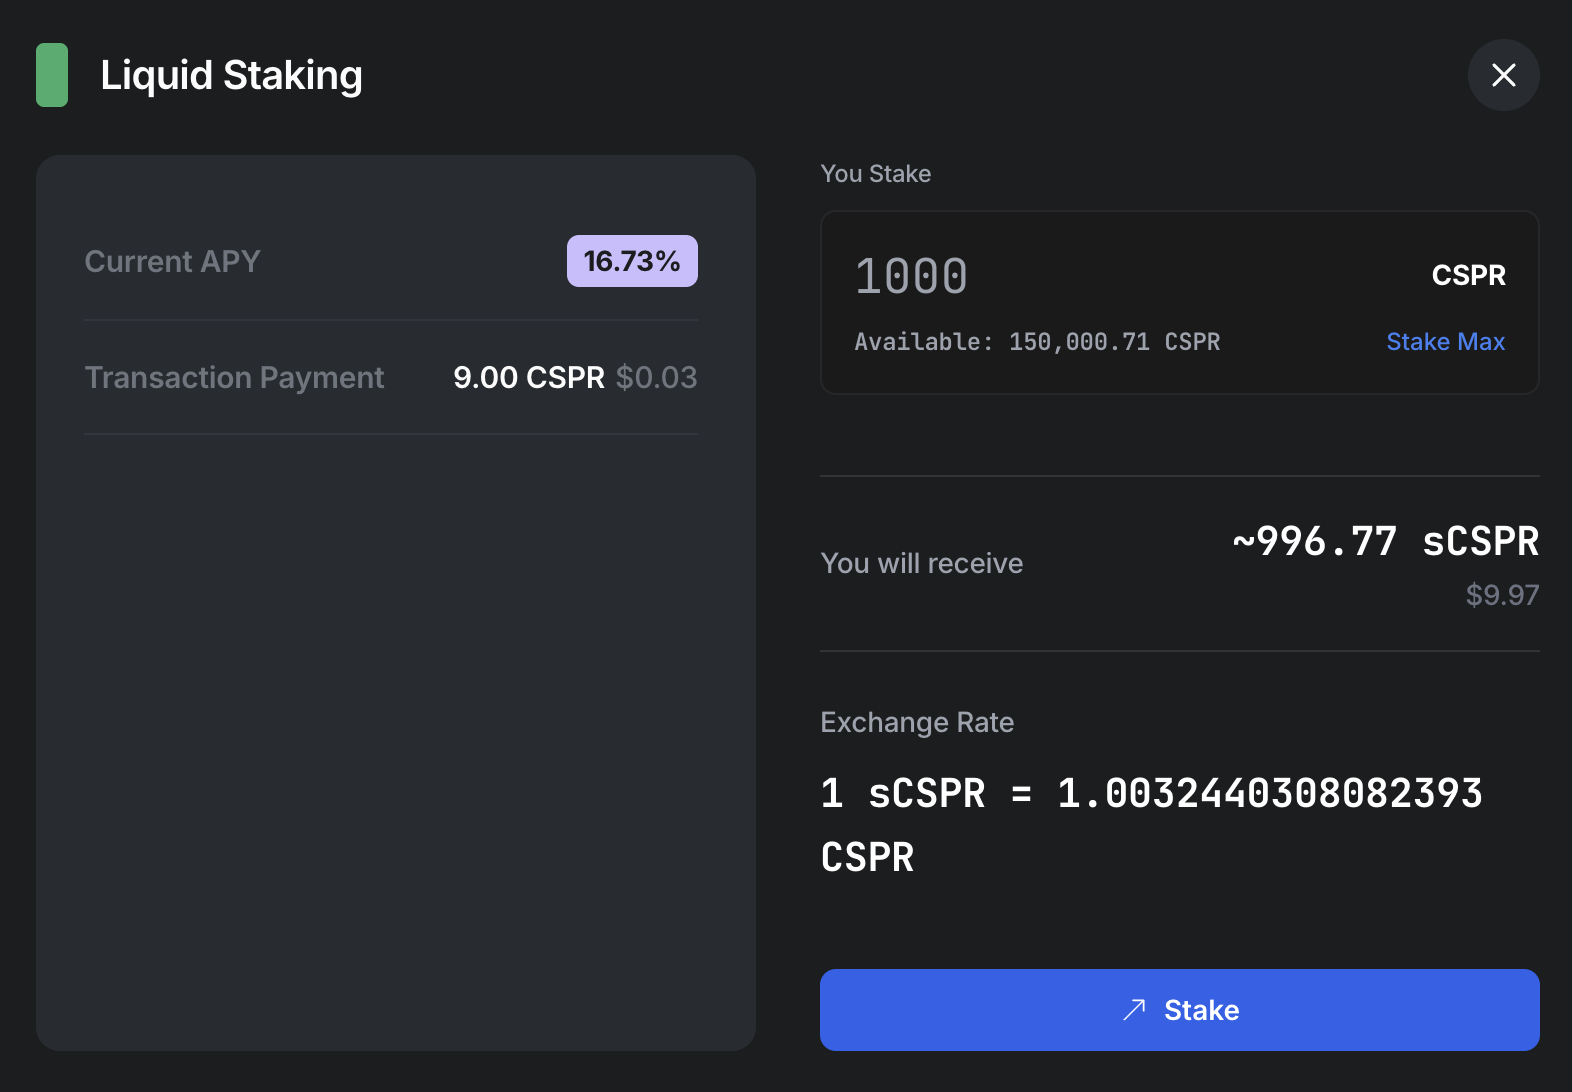
In the liquid staking model, you stake your CSPR, and in return, you receive a liquid token that represents your staked position, called sCSPR. That sCSPR can be held, transferred, and used across DeFi, while your original stake continues to earn rewards.
Soon, with the activation of CSPR Bridge, you will be able to move your sCSPR out to EVM ecosystems and use it there while your CSPR keeps earning regular staking rewards.
This guide walks you through liquid staking on Casper, end-to-end.
On Casper, liquid staking is designed to feel simple. You stake CSPR, you receive sCSPR, and the exchange rate between sCSPR and CSPR grows over time as staking rewards accumulate. That means 1 sCSPR should gradually become redeemable for more CSPR than before.
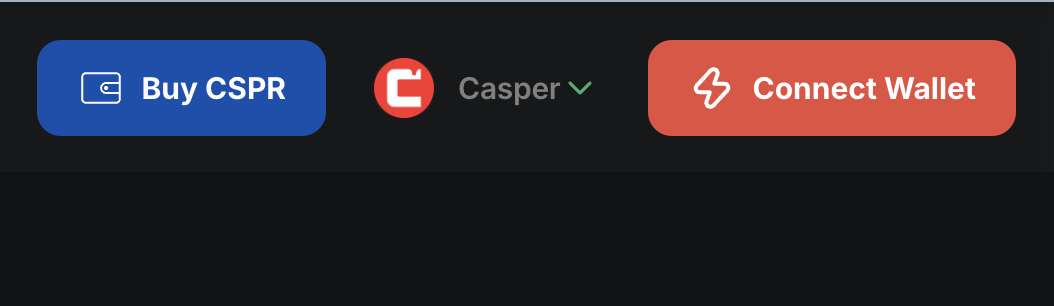
If you haven’t already, you can use the “Buy CSPR” button to get CSPR.
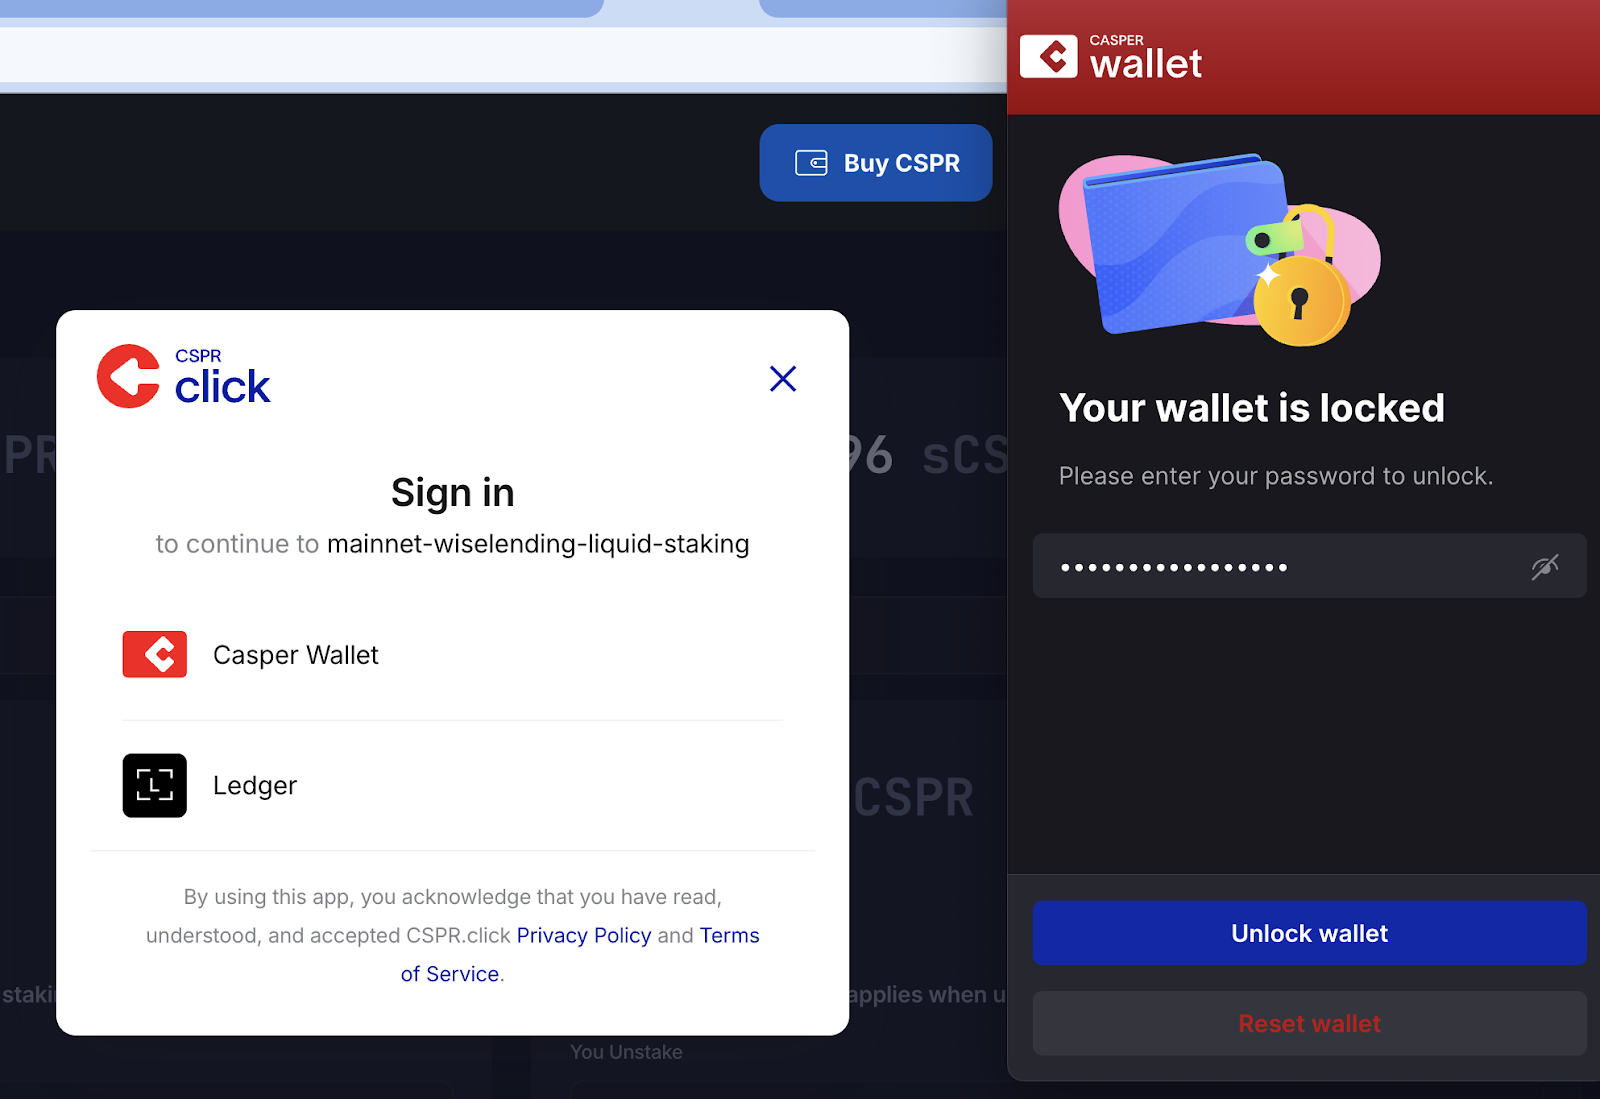
3. Unlock your Casper Wallet, select your account, and connect to the liquid staking platform.
You should now see your wallet address connected and your available CSPR balance visible in the app.
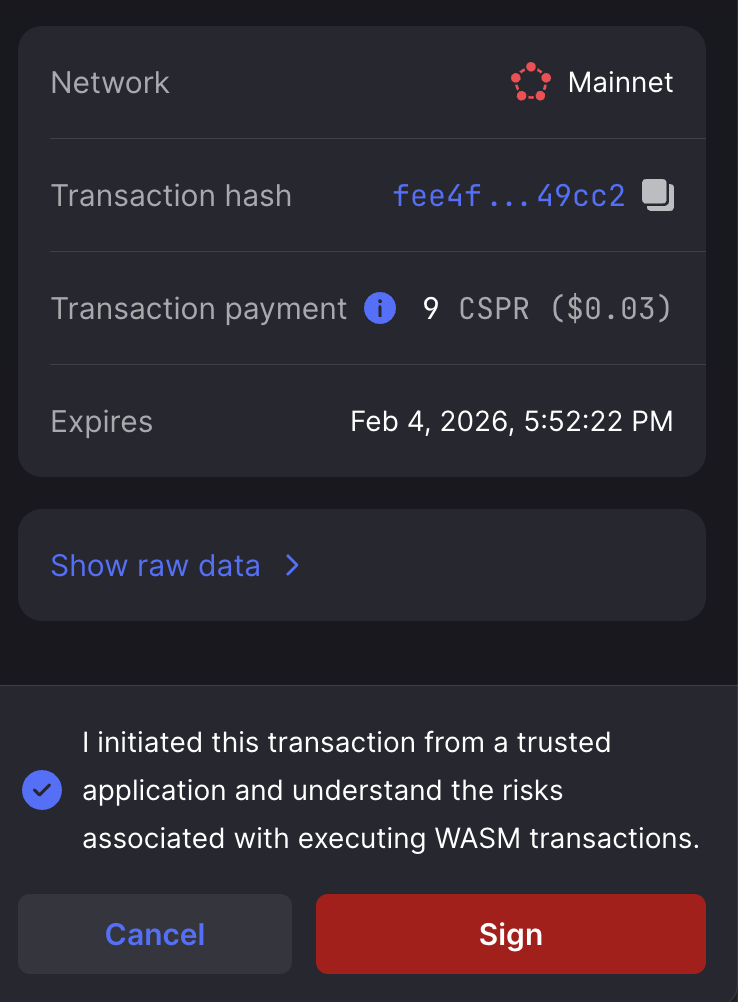
Once the transaction is finalized, you will be shown the details. Click done.
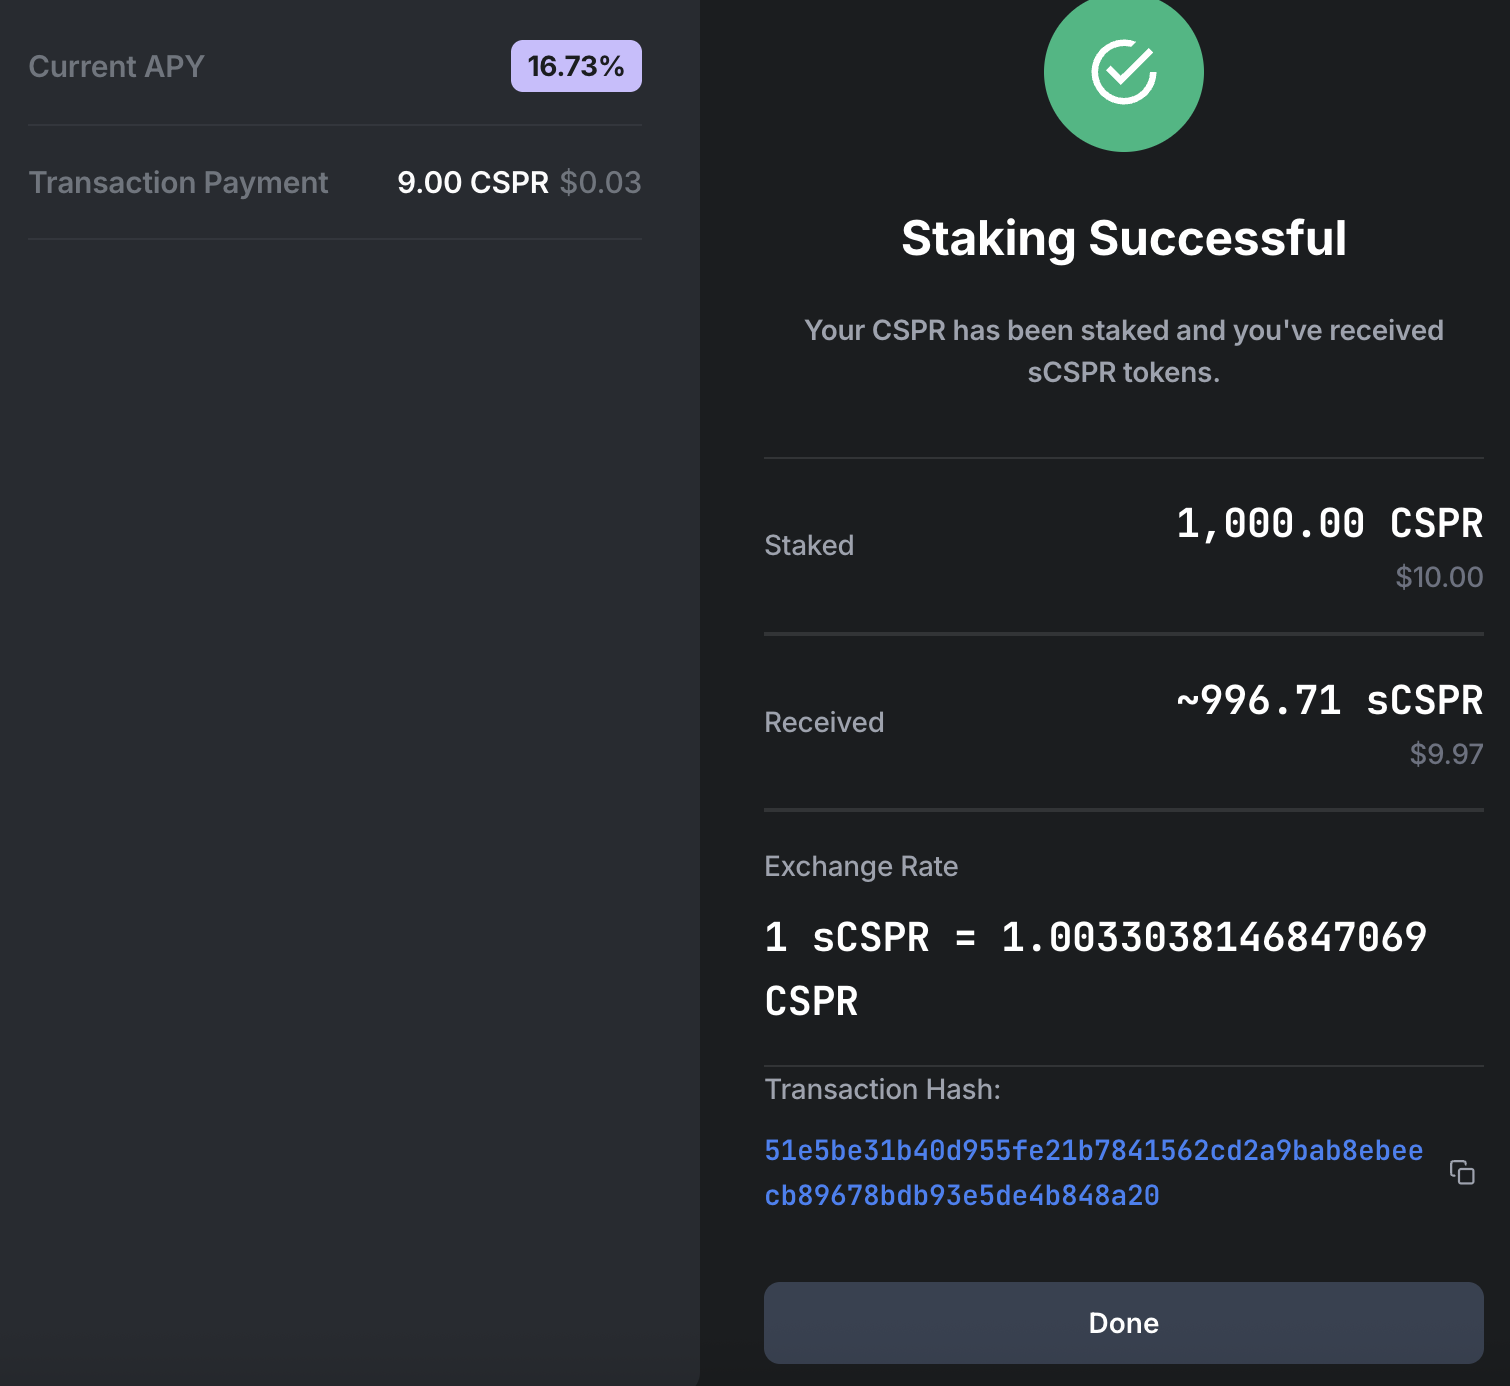
You now have sCSPR! Your sCSPR is displayed in the Casper Wallet UI as well as the “sCSPR Balance” section of the liquid staking platform.

Now that you’ve minted sCSPR by staking your CSPR, your CSPR has begun earning staking rewards, and it’s time to put your sCSPR to use. While the possibilities for sCSPR will continue to expand as Casper’s DeFi landscape evolves, you can already use sCSPR for swaps on CSPR.trade, Casper’s native decentralized exchange.
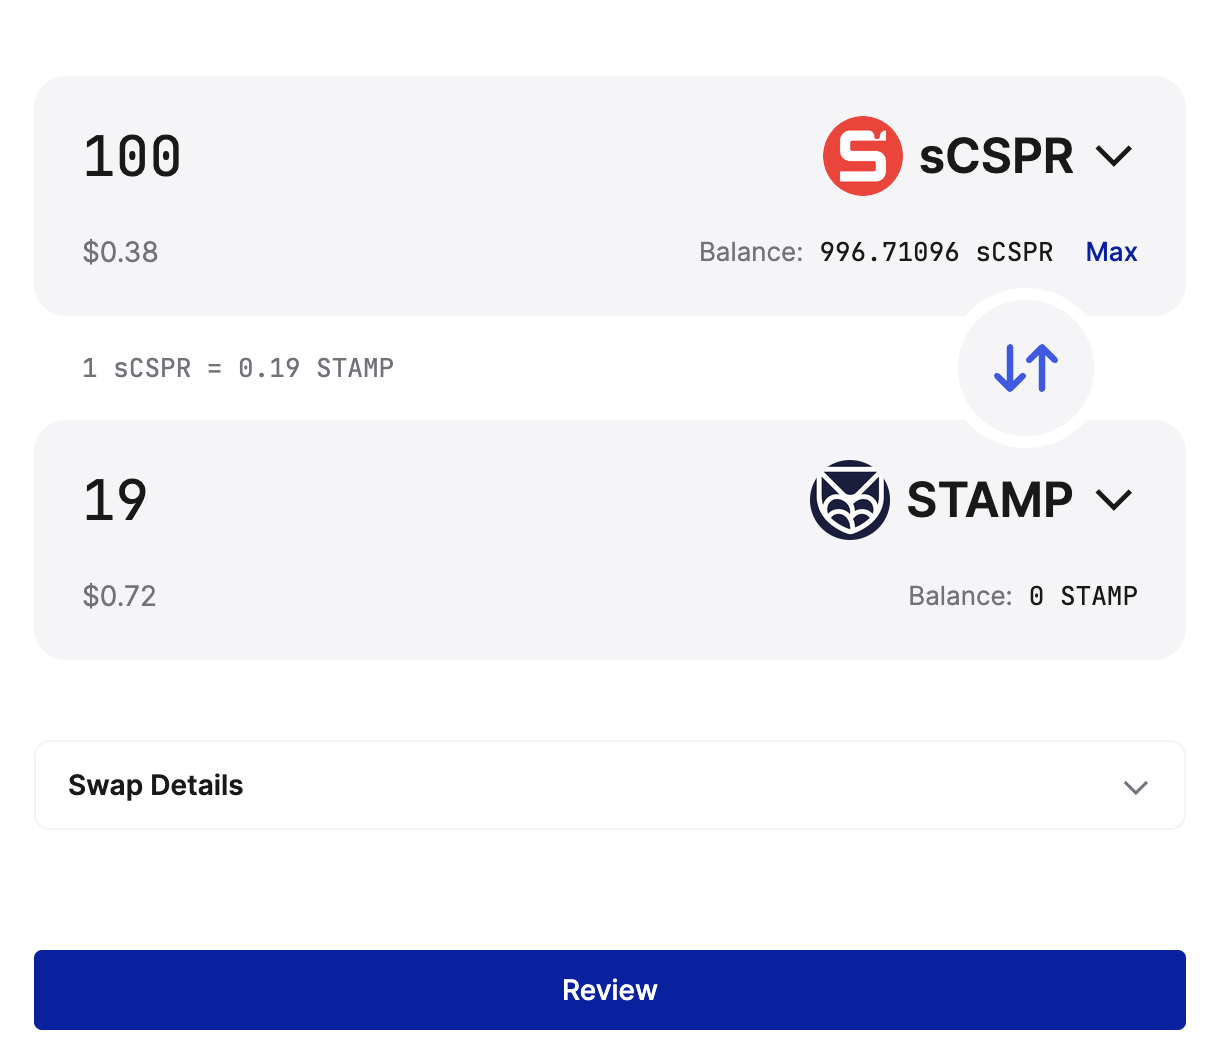
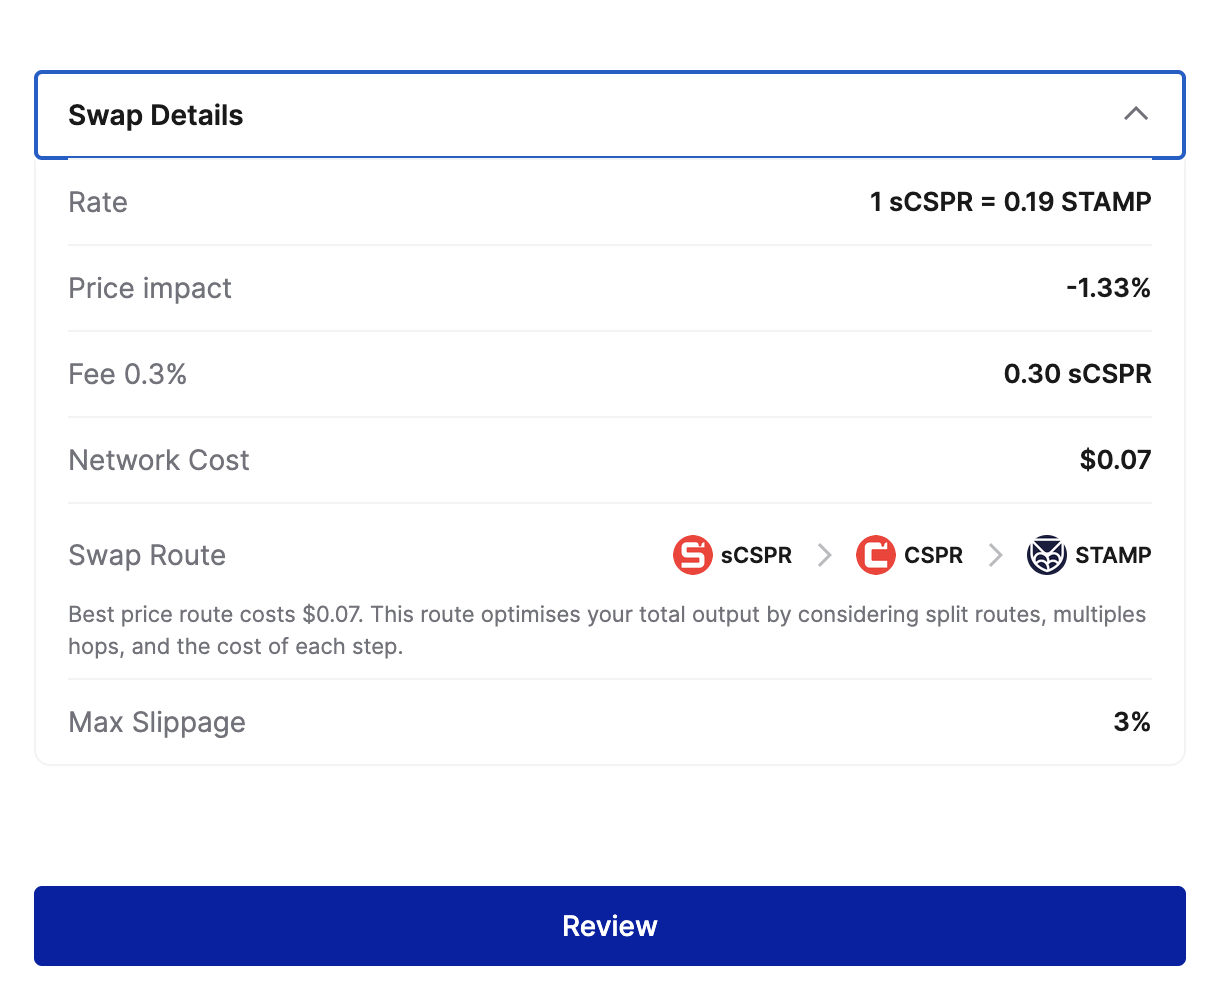
After signing the transaction in your Casper Wallet, your swap will complete.
Unstaking converts your sCSPR back into CSPR. You need to wait for 7-eras (~16 hours) period applies when unstaking sCSPR tokens.
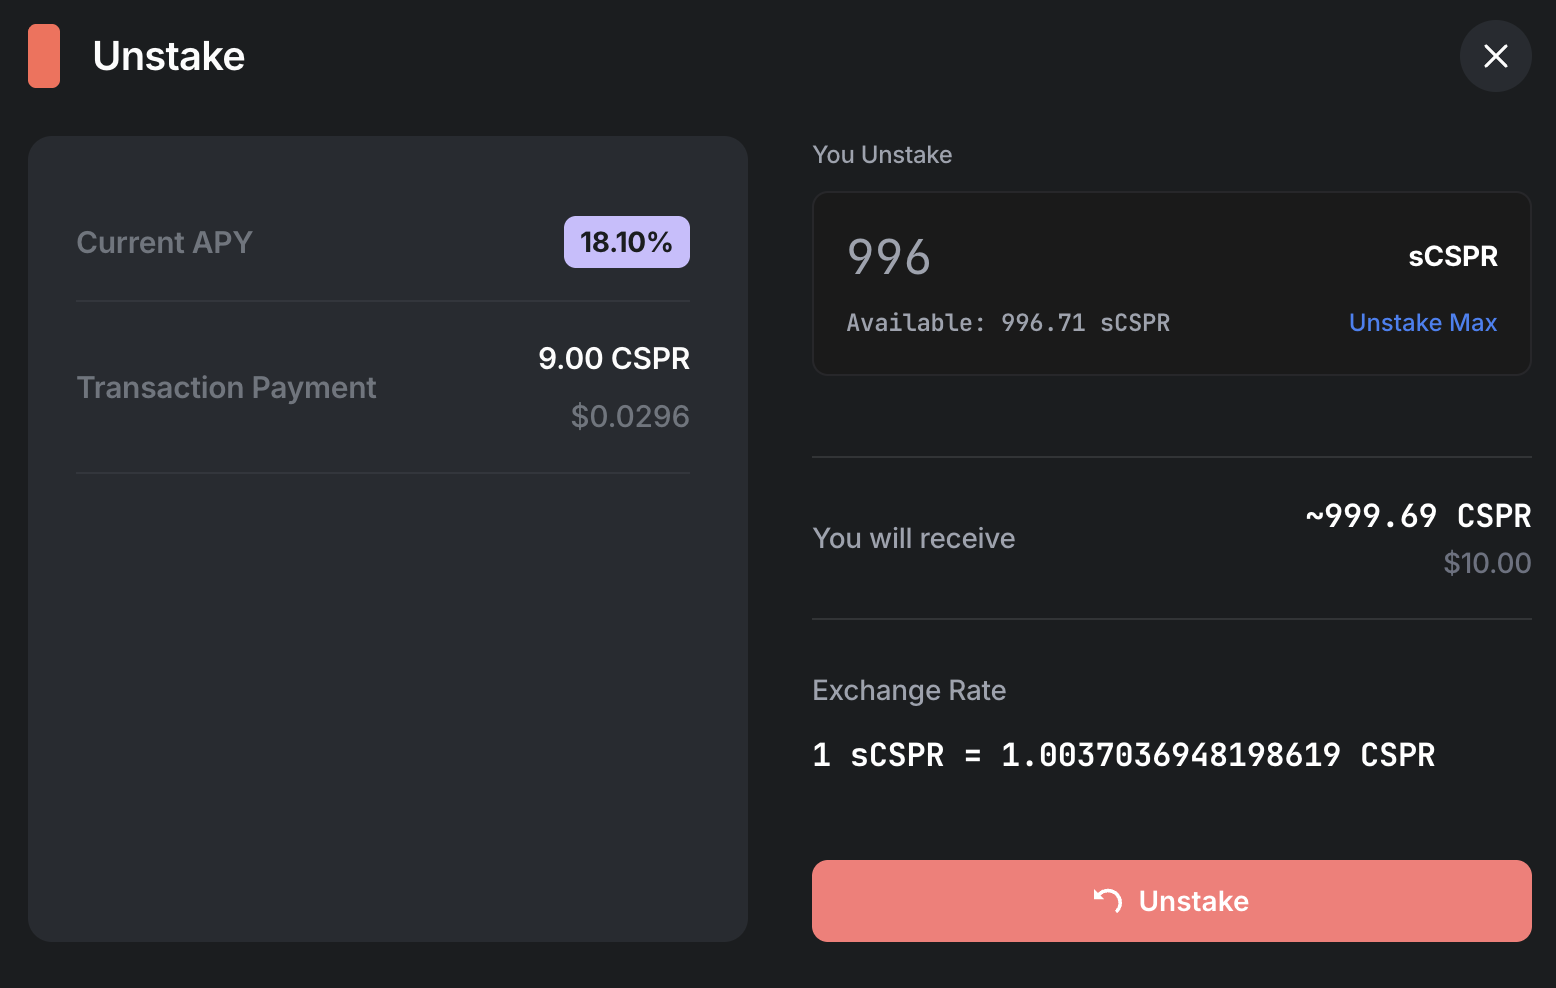

Once the waiting period passes, your CSPR becomes available to withdraw.
After completion, your CSPR balance will increase.
